
Template Name, Purpose, and Paper Size
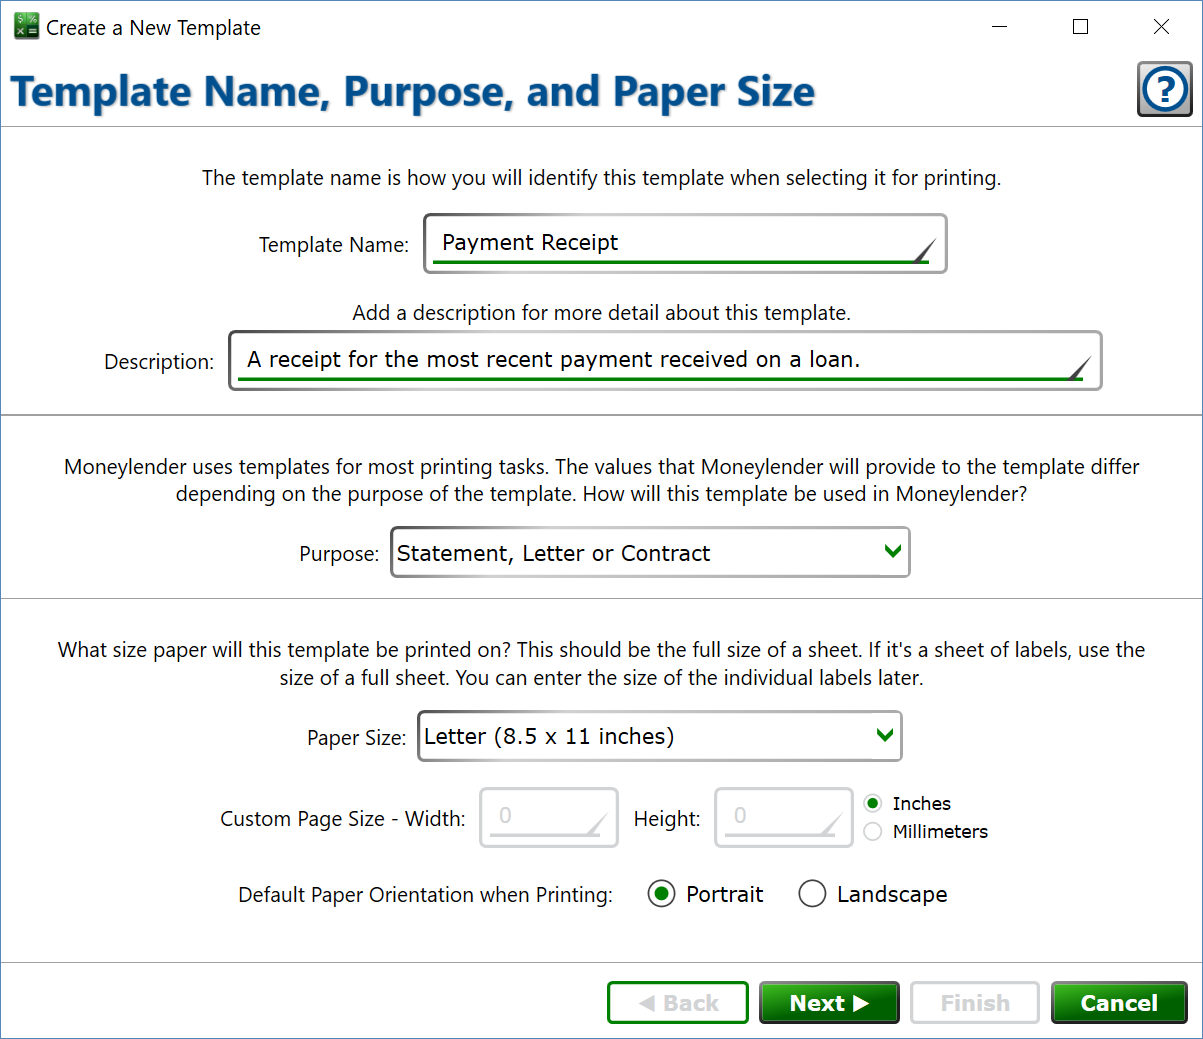
You can find this window from Servicing > Manage Templates and clicking the New (plus) button, or selecting a template and clicking the Edit (pencil) button.
Template Name – enter a name for the template. The name will appear on the Servicing menu if applicable, as well as in the drop-down of templates to choose from on the Print Template window and the Edit Report window.
Description – enter further details about the template to help distinguish between similar templates, if desired.
Purpose – the purpose of the template determines which tags are available when printing the template, and also where in Moneylender the template will be used.
- Statement, Letter or Contract (aka Statement) – use this template for letters about the loan to the borrower. This is definitely the most common template. Can be shown on the Servicing menu.
- Payment Voucher – use this template for creating booklets of payment vouchers for your borrowers. The template will be rendered once for each scheduled payment due date within the selected date range on the Print Template window. It has all the tags from the Statement type plus additional per-payment tags for the payments that are scheduled. Can be shown on the Servicing menu.
- Printed Check – use this template to print a check or other disbursement. It can also have some other interesting uses, such as a disbursal letter when loaning additional funds on an existing loan. It has all the Statement tags plus tags specific to a single Principal or Escrow disbursal record.
- Envelope – do not use. Use the Statement type instead.
- Labels – do not use. Use the Statement type instead.
- Report Header – Per Loan – this template can be set as the header for any single-loan reports, such as Ledger Transactions, Payment Distribution, and Amortization Schedules. This includes all the tags for the regular Statement, as well as a set of report-specific tags like report name and report date ranges.
- Report Header – Per Lender – this template can be used for any reports that tally up the figures from multiple loans. It includes tags about the lender used for the report, and report-specific tags like title and date range.
- Payoff Quote – this type is used for generating payoff quotes. It includes all the tags from the Statement template and a set of tags with the details of the payoff generated by the payoff calculator.
- Escrow Analysis – this type is used for printing an Escrow Analysis letter. It includes all the Statement tags plus a set of tags with the details of an escrow charge setting or information from the escrow adjustment calculator.
SmartSend Type – tells SmartSend which role this template fills when it's printed or emailed. Set your regular statement template to Regular Statement and your late fee notice template to Late Fee Notice; leave every other template set to None. A template can fill only one SmartSend role. When a flagged template is emailed or printed, Moneylender records that the loans received their current statement or late fee notice, and the SmartSend items on the Servicing menu use that tracking to build their one-click batches. See the SmartSend guide for the full walkthrough.
Paper Size – This value will be pre-populated into the printer settings when creating the print job for the template.
Custom Page Size – select Custom for the Paper Size and enter the width and height in inches or millimeters.
Default Paper Orientation when Printing – choose if the printer should be set to Portrait or Landscape when printing.
Click to set the template size.