
Moneylender's Main Window
The Main Window is divided into four components:
- The Main Menu
- The Toolbar
- The List of Loans
- The Loan Details Panel
- Keyboard Shortcuts
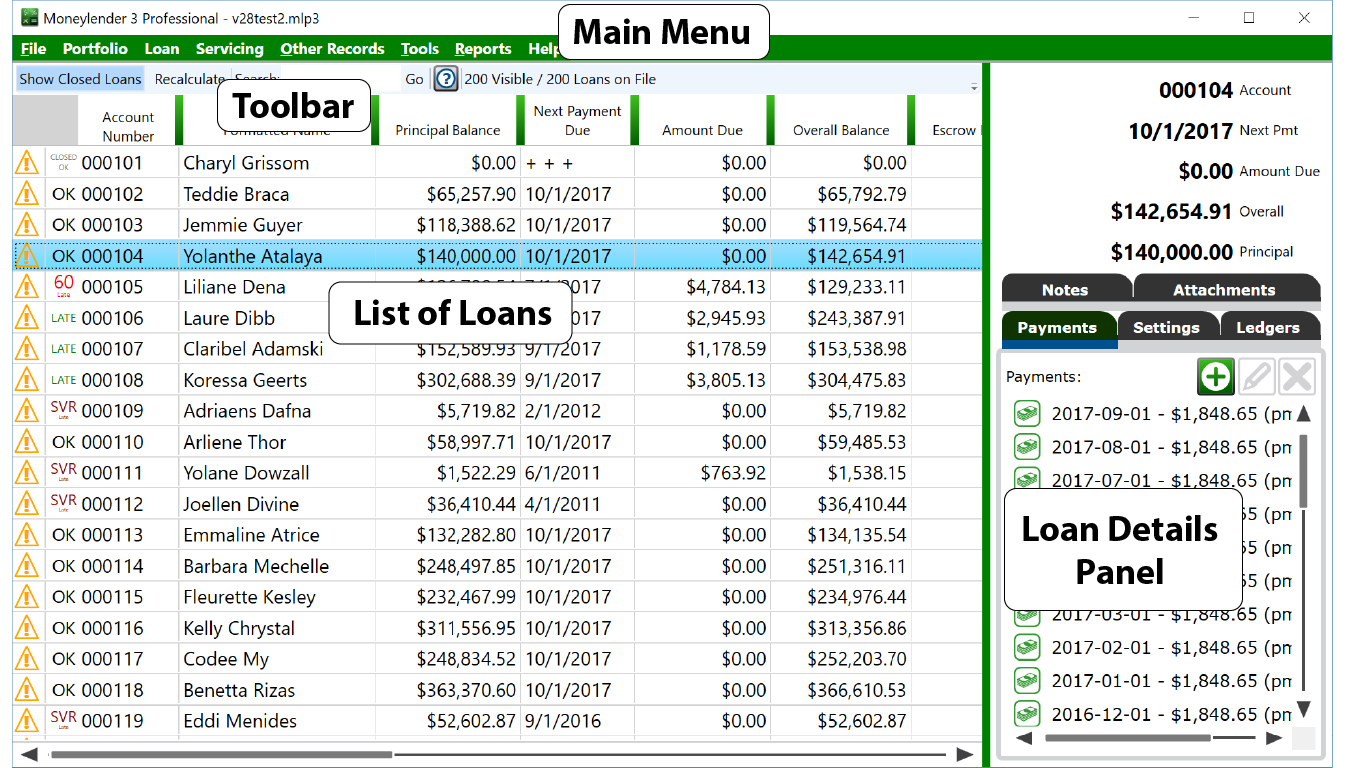
Use the menu for actions that have big effects like choosing the portfolio file to work with, printing statements, setting the program-wide and portfolio-wide settings, running reports, and other management-oriented actions.
Servicing options all greyed out? Click any loan in the list first. Some of the template printing options require at least one selected loan.
Main Menu Items
Details about items on the main menu and what they do.
Loan Menu
Skip One Payment and Extend Loan - When you want to let the borrower skip the next due date on the loan (the first unpaid due date on the loan) and extend the loan by one payment. Interest is waived for that skipped payment and recurring fees are adjusted off, meaning the cost of the loan for the borrower does not increase even though it will take one additional cycle to repay. This will create a series of records to modify the structure of the loan. A Special Situation will defer the due date, reinstate the loan, and waive the interest. The last payment schedule will have the occurrence count increased by one. Any recurring fees that coincide with the skipped date will be extended by one and an adjustment is added to the loan to cancel the fee from the skipped date.
The Toolbar provides access to some features that make working with the loans easier. Showing or hiding closed loans, searching the list of loans.
The "Show" boxes on the toolbar choose what appears in the list—check "Loans" to display your active loans, "Applications" to also show loan applications that haven't been approved into loans yet, and "Closed" to include loans that have been closed.
Click "Recalculate" to run the loan calculation system on the selected loan(s) from the beginning of time. This is a harmless process that can sometimes fix a loan when it appears to be "stuck". When you edit settings on a loan, it will often recalculate the entire loan, just like when you click this button.
Click "New Loan" to create a new loan using the wizard chosen in your Portfolio Settings.
Type in the search box and click Go (or press enter) to filter the list of loans. Clear the search box and hit Go to reveal all the loans again.
The List of Loans displays all the loans in the portfolio (with closed loans hidden by default until shown using the toolbar). The columns on the list of loans can be set in the Moneylender Settings options. The size of the columns is preserved between sessions. Click a column to sort the loans by the selected column. Click again to reverse the sort order.
Selecting a single loan in the list of loans opens up most of the options in Moneylender. Selecting more than one loan opens up any options that are valid for multiple loans, such as printing statements for the selected loans or exporting those loans.
In date columns, you may see "- - -" to indicate "the beginning of time" and "+ + +" to indicate "the end of time". These two values are commonly used where an actual date is not valid. For example, an open loan will show "+ + +" in the Closed Date column. If the first due date on the loan is far in the future, you'll see "- - -" in the Current Due Date column.
Click the warning triangle at the left edge of a loan's row to see the warnings and notices on that loan—the triangle turns red when the loan has notification. A red triangle doesn't necessarily mean a loan is incorrectly configured. These warnings are here to tell you when certain events are about to occur on the loan - the loan is about to hit its maturity date, an escrow disbursement is due for payment soon, etc.
The Loan Details Panel provides comprehensive access to the settings on the selected loan. You can review and manage the payments on the loan, all the settings from interest rates to escrow, review notes, and attach files. The details panel is where you go to manage everything relevant to the selected loan.
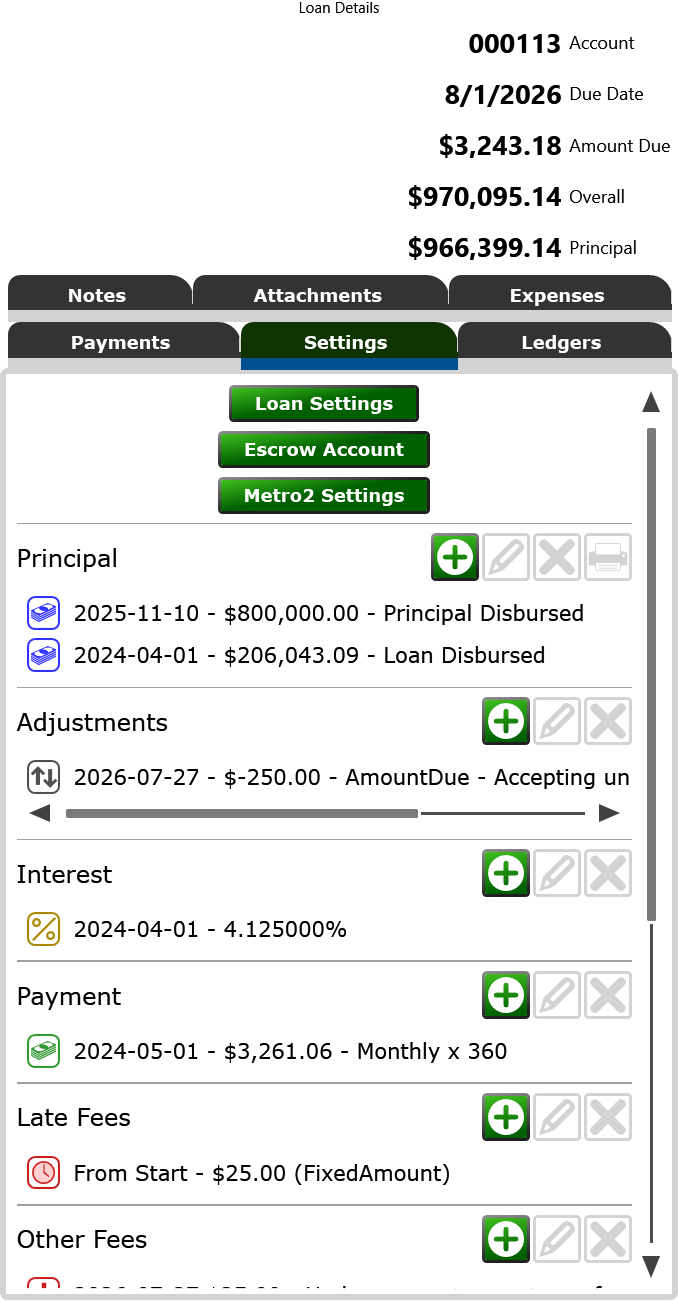
The Settings tab is where you control everything about the terms of the loan. A loan can have an unlimited number of each setting type. Refer to the topics in the "Loan Records (Settings Tab)" category in the table of contents for details about each setting. If changing something about a loan in the middle of the loan, add a new setting instead of editing the existing setting. If the payment is going from $1000 to $1500, you want to add a new Payment setting with the new amount and the date it takes effect. If you edit the old setting, it tells Moneylender the payment was always $1500 and it loses the information about the period of time where the payment was $1000.
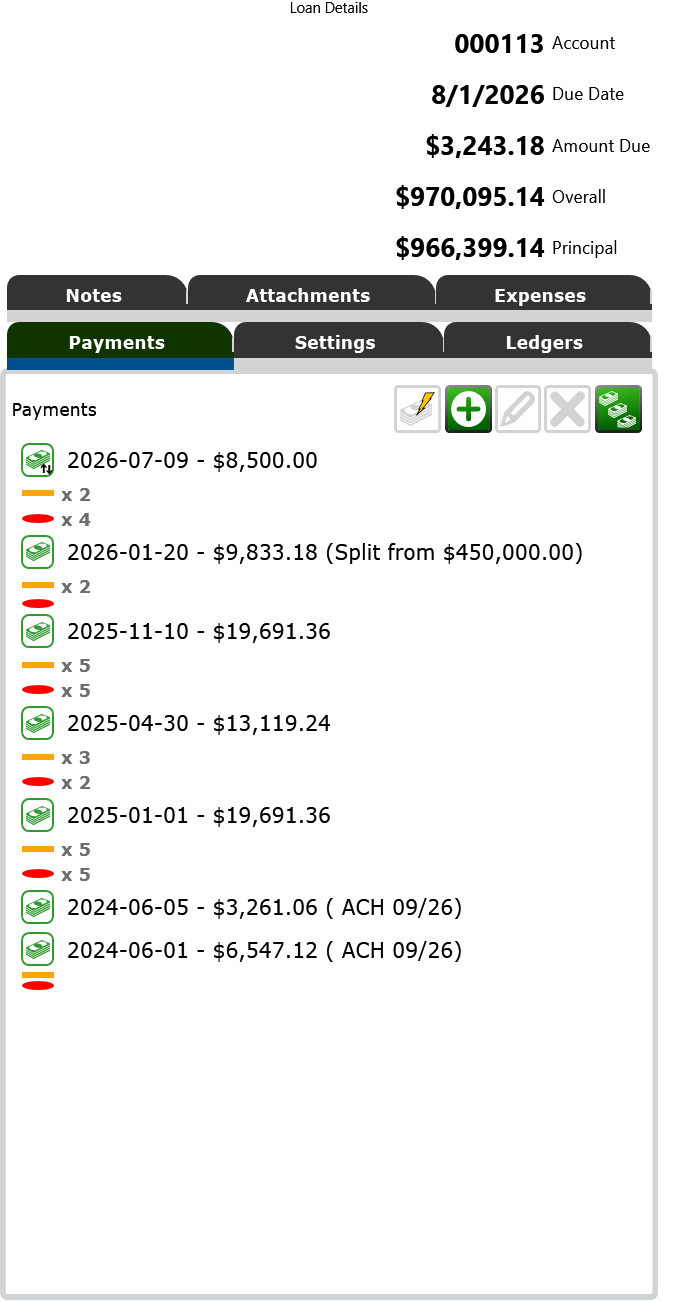
On the Payments tab, two extra buttons sit beside the payment list: the split payment button divides a single payment across several upcoming due dates, and the AutoPay button manages AutoPay enrollment and scheduled payments for the selected loan.
Red and orange markers are shown between payments as a convenient visual reference. Hover over the shape for more information. Red ovals indicate that an entire cycle passed by without any payment being received from the borrower. Orange rectangles indicate that a late fee was charged on the loan. If you waived a late fee, the rectangle will be gray instead.
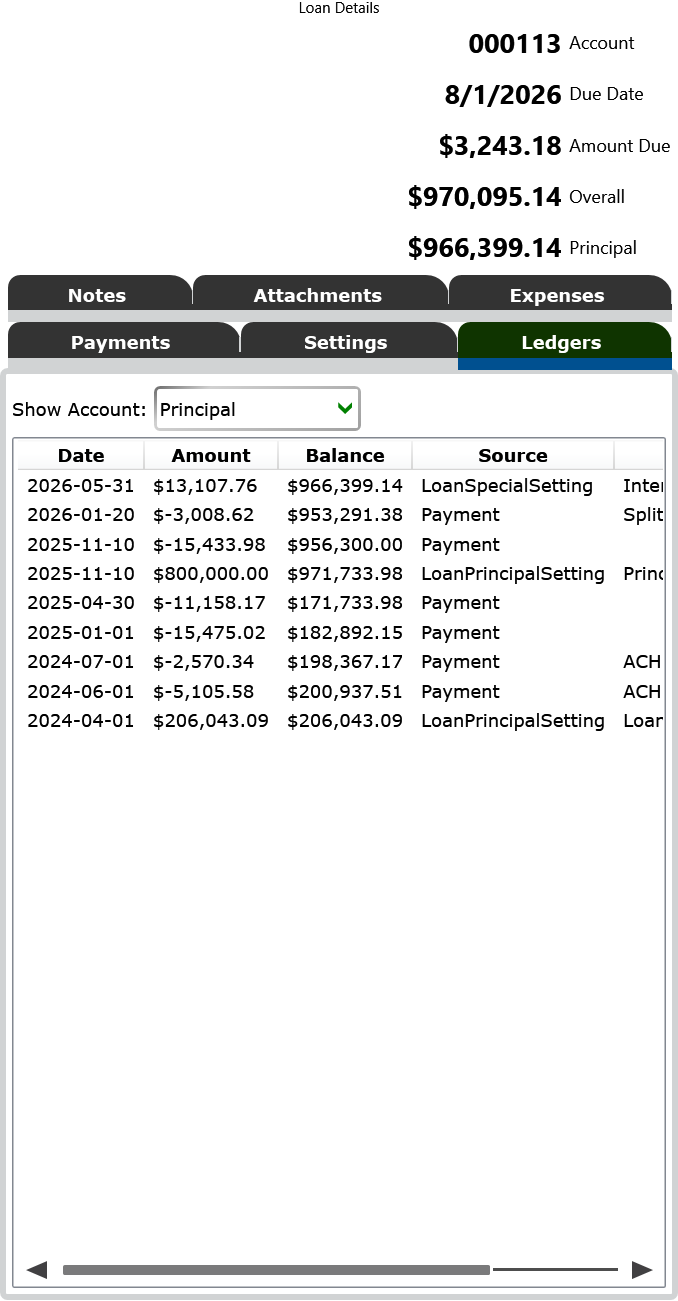
On the Ledgers tab, choose an account from the Show Account box to review that ledger's transactions - it's functionally very similar to the Ledger Transactions report but you can't adjust the displayed date range. Double-click a late fee to waive it. Double-click a regular payment due to defer it. Waiving or deferring just creates an Adjustment setting on the Settings tab to reverse the chosen transaction. To undo that action, delete the appropriate Adjustment record from the Settings tab.
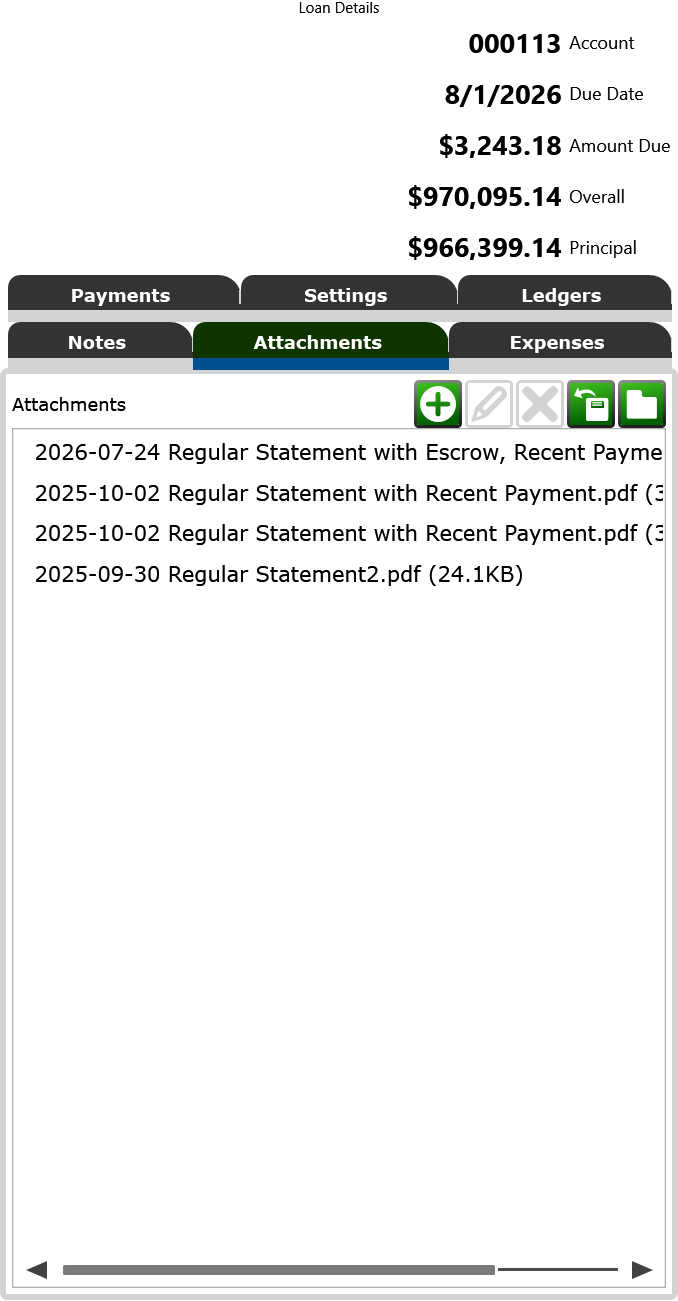
On the Attachments tab you can drag files onto the list to attach them, create folders to keep attachments organized, export a copy of an attachment back to your computer, and double-click an attachment to open it.
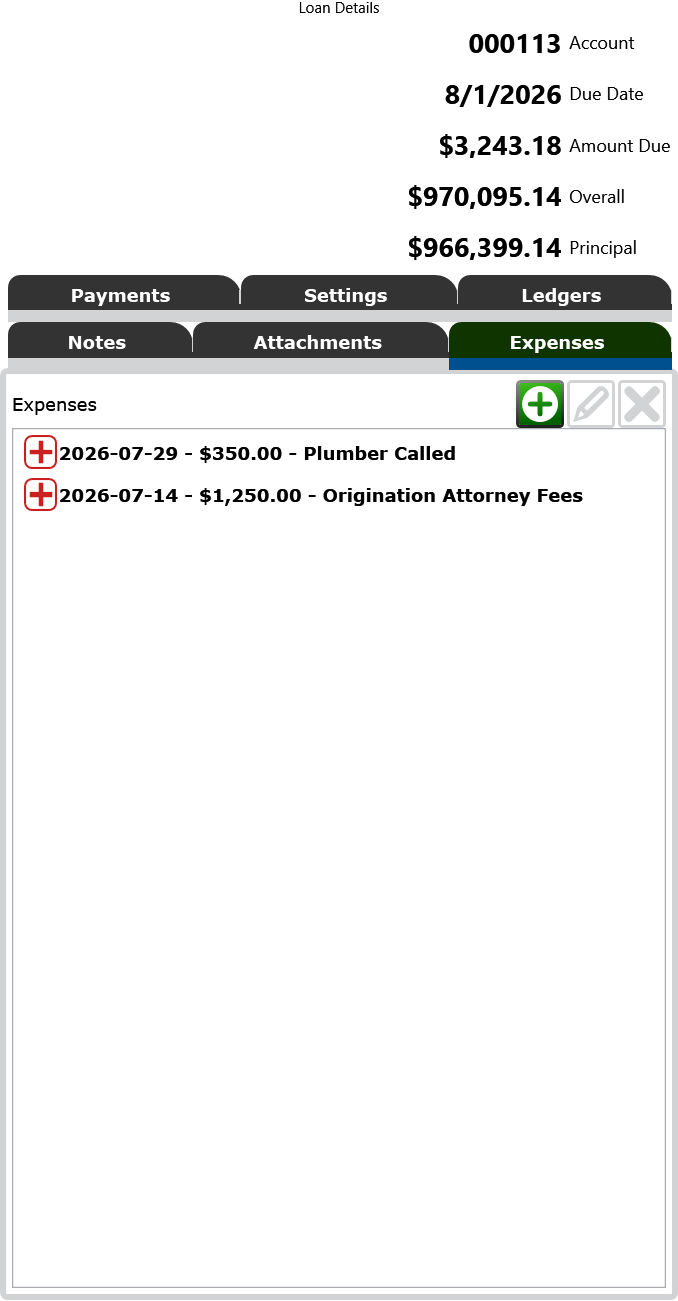
Use the Expenses tab to record, edit and delete the expenses you incur while servicing the loan.
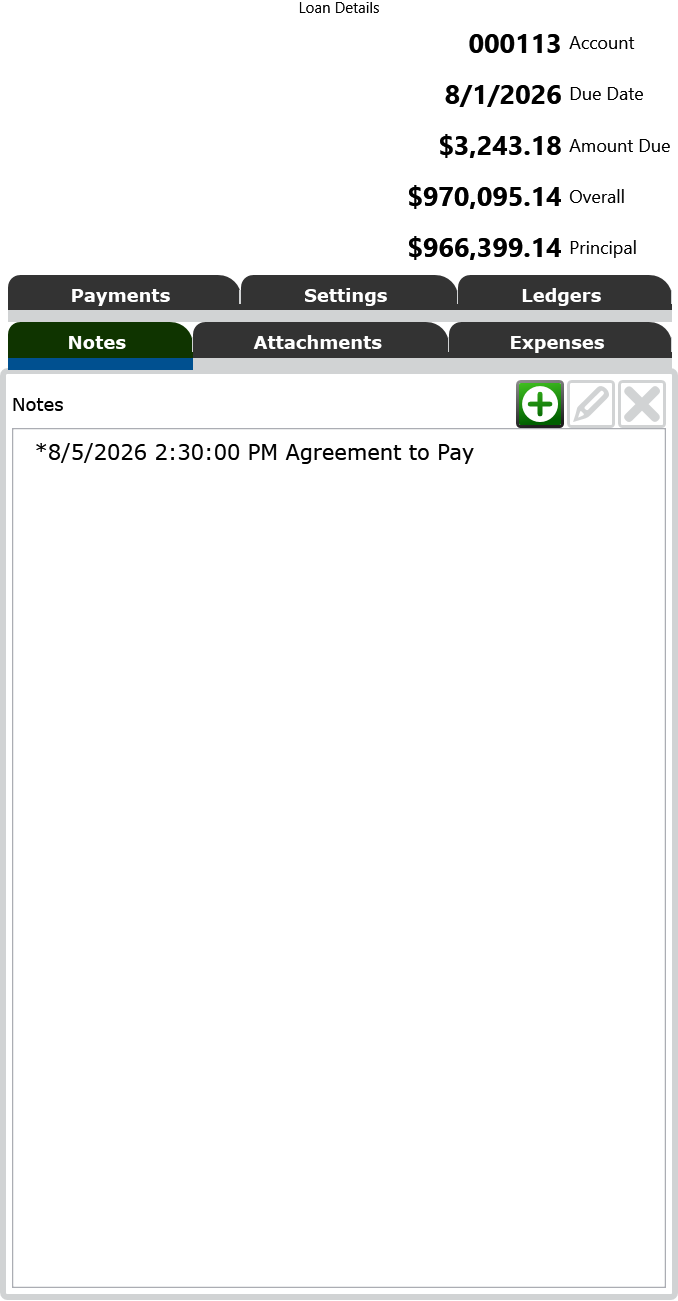
On the Notes tab, store various pieces of information related to the loan for later reference if needed. A Note can be used to set a reminder that appears at the bottom of Moneylender's main window. When a note's reminder date arrives it appears in a notifications panel along the bottom of the main window—double-click a reminder to jump to that loan and its note. The reminder panel can be turned off in Moneylender Settings.
Drag the vertical divider between the list of loans and the Loan Details Panel to make the details panel wider or narrower.
For file portfolios, a backup status bar appears above the details panel—click the backup button to save a backup of your portfolio right away, or the pencil button to open the automatic backup settings. If you are connected to a network portfolio hosted elsewhere, the backup panel is not visible.
Moneylender Online: the main window in Moneylender Online works the same, with a few differences: File > Log Off ends the browser session and returns to the sign-in page, the Help menu shows the version number instead of an About window, and on the Attachments tab files are uploaded with the Attach button (or dragged onto the list from your computer) and downloaded through the browser when exported or double-clicked.
Keyboard Shortcuts for the Main Window
- Ctrl-S - put focus on the search box
- Ctrl-L - select the first loan in the list
- Ctrl-P - add a new payment to the selected loan
- Ctrl-D (when focus is on any date picker in Moneylender) - set the date in the box to Today