AutoPay - Enrollment and System Walkthrough
Borrower AutoPay Login URL: https://whitman.tech/payments
Upon your approval for the AutoPay service, you can enroll your portfolio file(s) with the AutoPay system so Moneylender can synchronize borrower account information as needed.
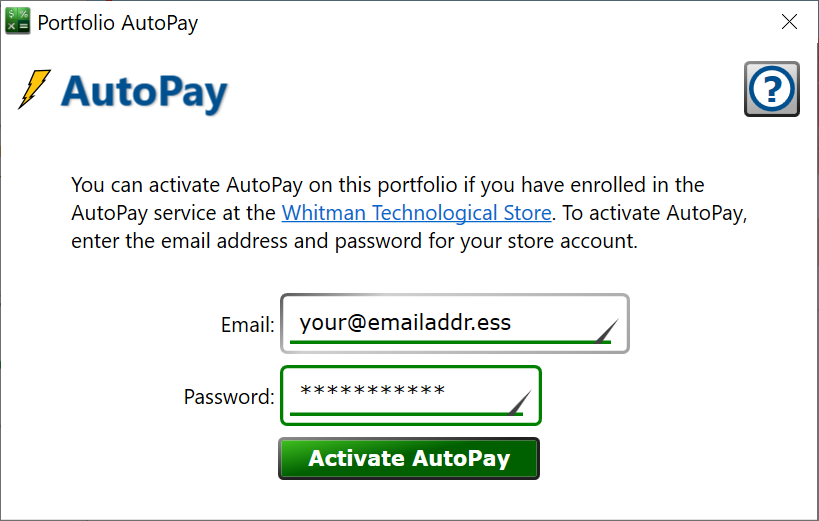
To register the portfolio with your AutoPay account, click Portfolio > AutoPay. Enter your email and password for the Whitman Tech Store and your portfolio will be registered to your AutoPay account. You’re ready to start enrolling loans in AutoPay!
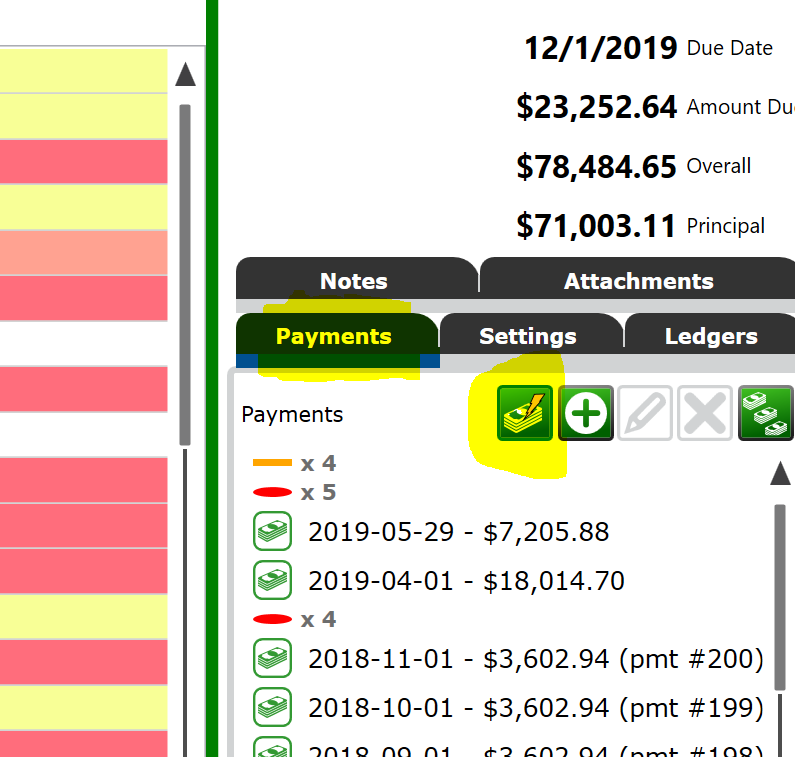
To enroll a loan in AutoPay, so your borrower can set up an online account and access their balance, due date, and ACH payments select a loan > Payments tab > AutoPay (money stack with lightning bolt) button.
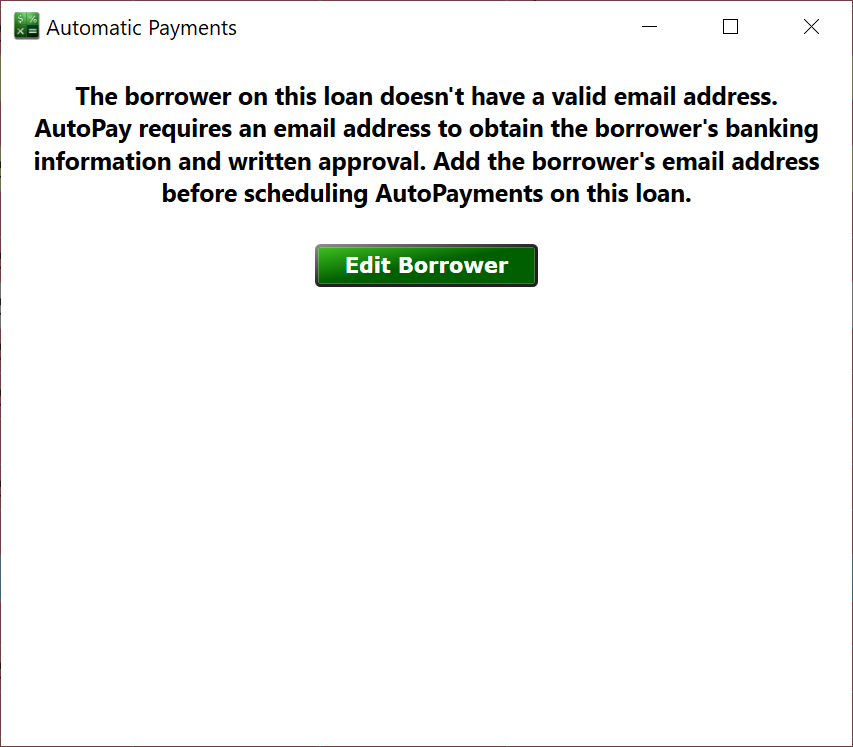
AutoPay will contact the borrower by email with an enrollment code, and also upcoming payment reminders and payment failure notices. If your borrower record doesn’t have an email address, click the button and you can add their email using the Borrower Wizard. Once you have entered a valid email for the borrower, you’ll see the window below.
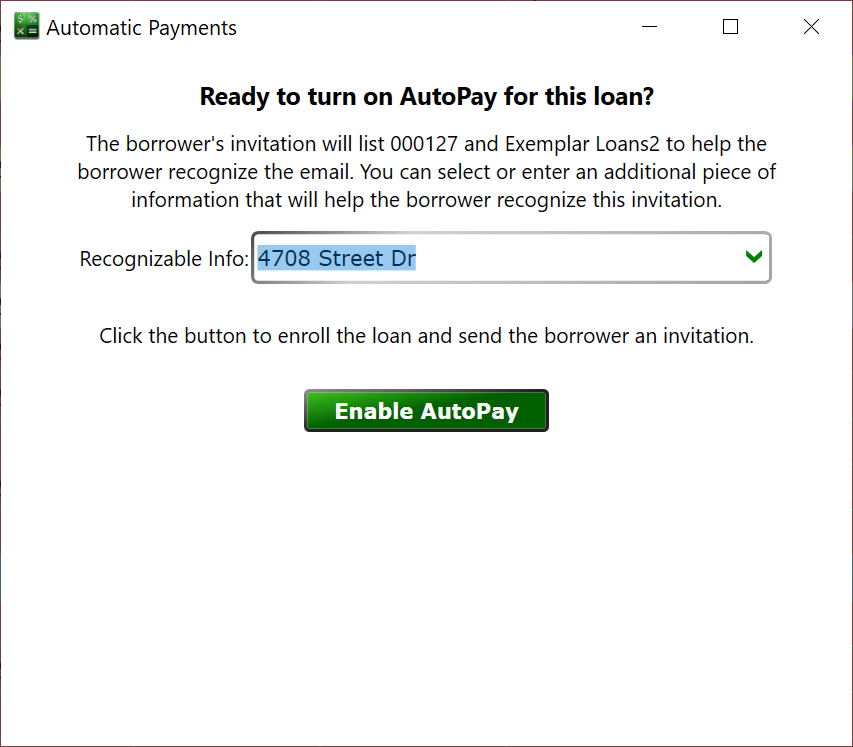
Some lenders don’t use account numbers in their paperwork or other reference materials, and the borrower might not recognize the invitation email if it just has some internally generated account number in it. To help with this, you can optionally enter some additional infor that will help the borrower realize the account is their real-life loan. For mortgages, this might be a property address. For vehicles it might be the year, make and model. For other purchases, it might be a short description of the good. For other loans, it might be a description of the purpose of the loan. Something that the borrower will recognize when they see it in the subject and body of the invitation email. It can be left blank if your lender name and the account number are easily recognizable to the borrower.
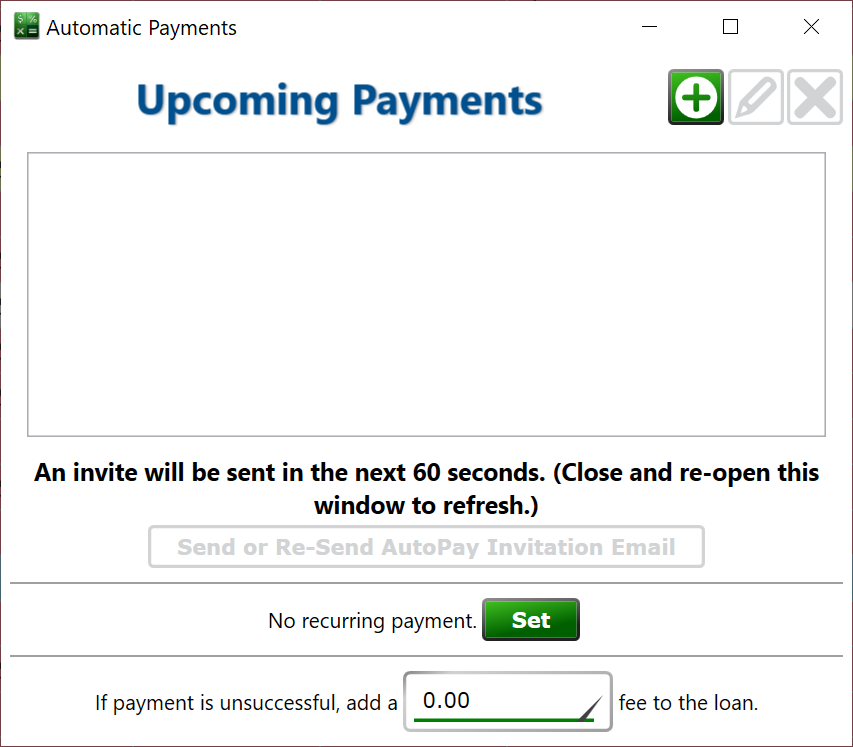
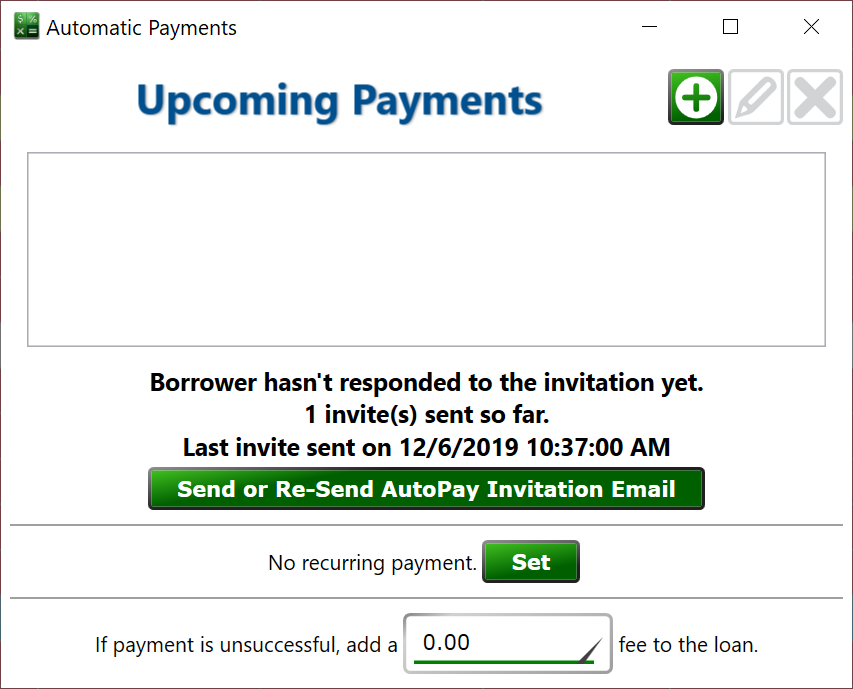
Once you click , you’ll be taken to the normal AutoPay window for the selected loan. You’ll see a note that an invitation will be sent in the next 60 seconds. If you close/open the window after a minute has gone by, you’ll probably see a new message with the date/time of the last reminder, and an option to re-send the reminder.
AutoPay will send a second reminder 24 hours after the first one if the borrower has not yet created an account. It will make a third and final invite attempt 24 hours after that. After three automatic reminder, you can always click the button to have the system send another reminder, but it will only make the three email attempt from the first time an invitation is requested on the loan.
Once the borrower has created an account, you will not be able to Re-Send invitations, but the borrower can use the Forgot Password link on the AutoPay login page to have a reset link sent to their email address.
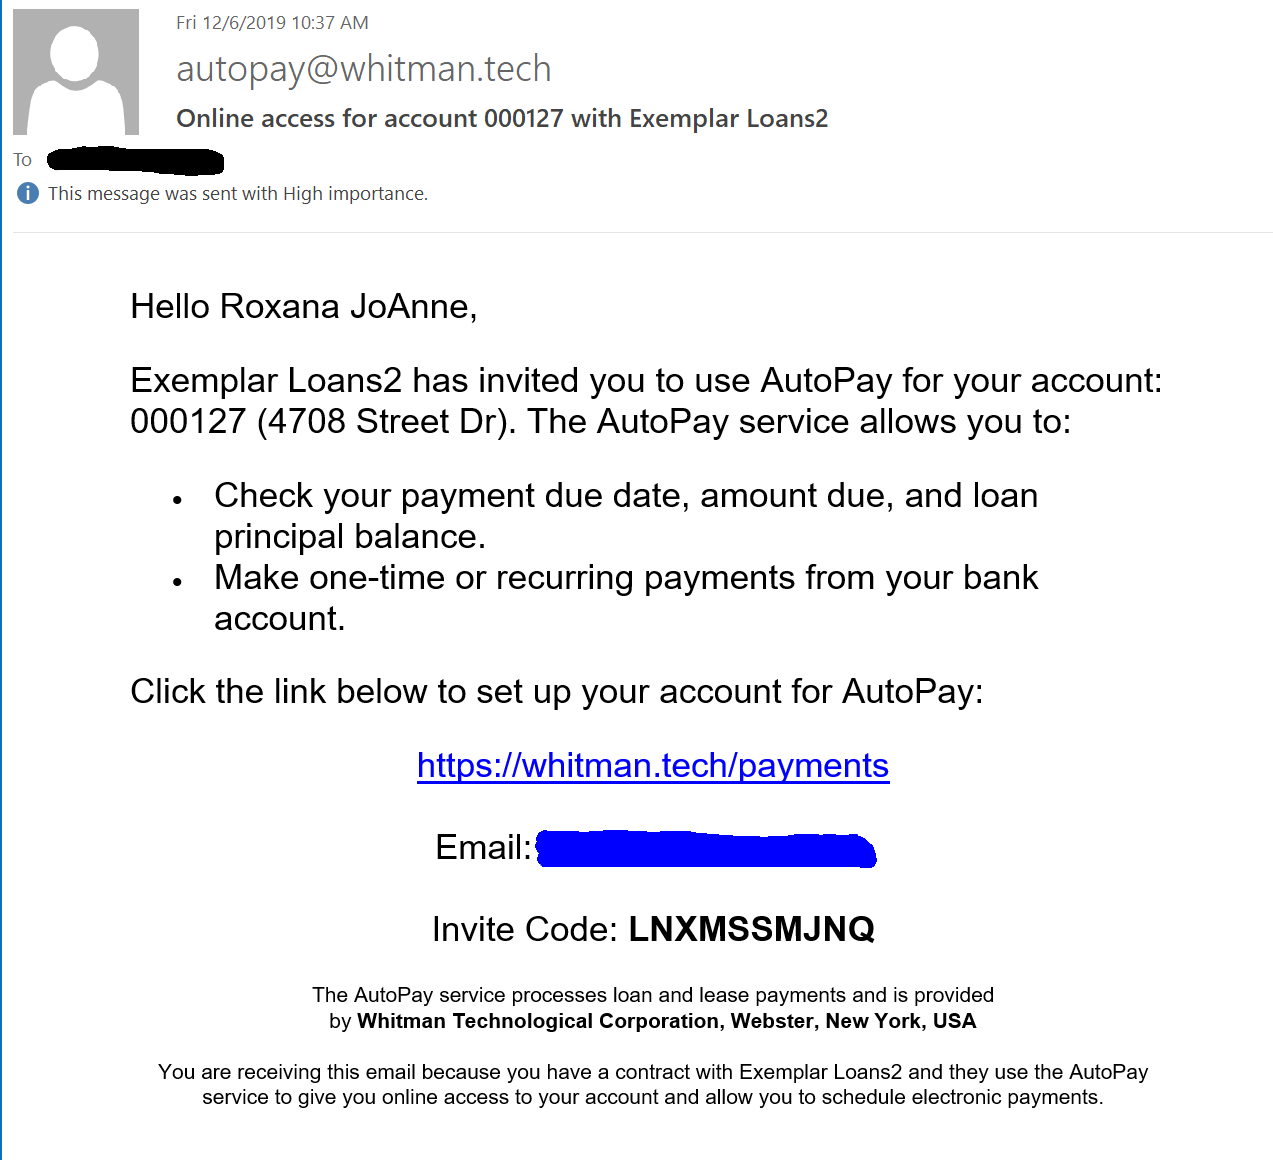
The borrower will receive an email that looks like the following. When they click the https://whitman.tech/payments link the email and invite code will already be filled in. If they don’t click the link but type the URL into a browser, then can type their email and the invite code into the boxes.
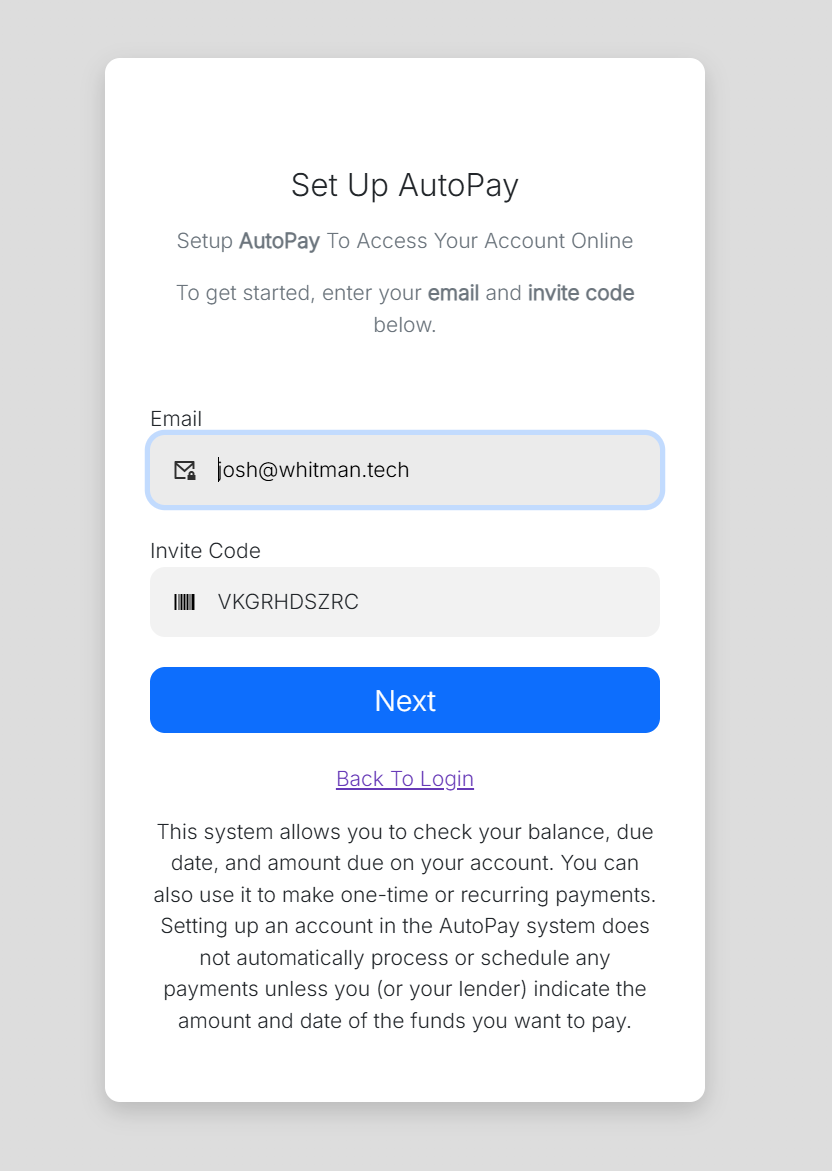
When the borrower clicks Next, they’ll be able to set their account password. Because AutoPay deals with sensitive information, passwords must be at least eight characters, with uppercase, lowercase, numbers and symbols.
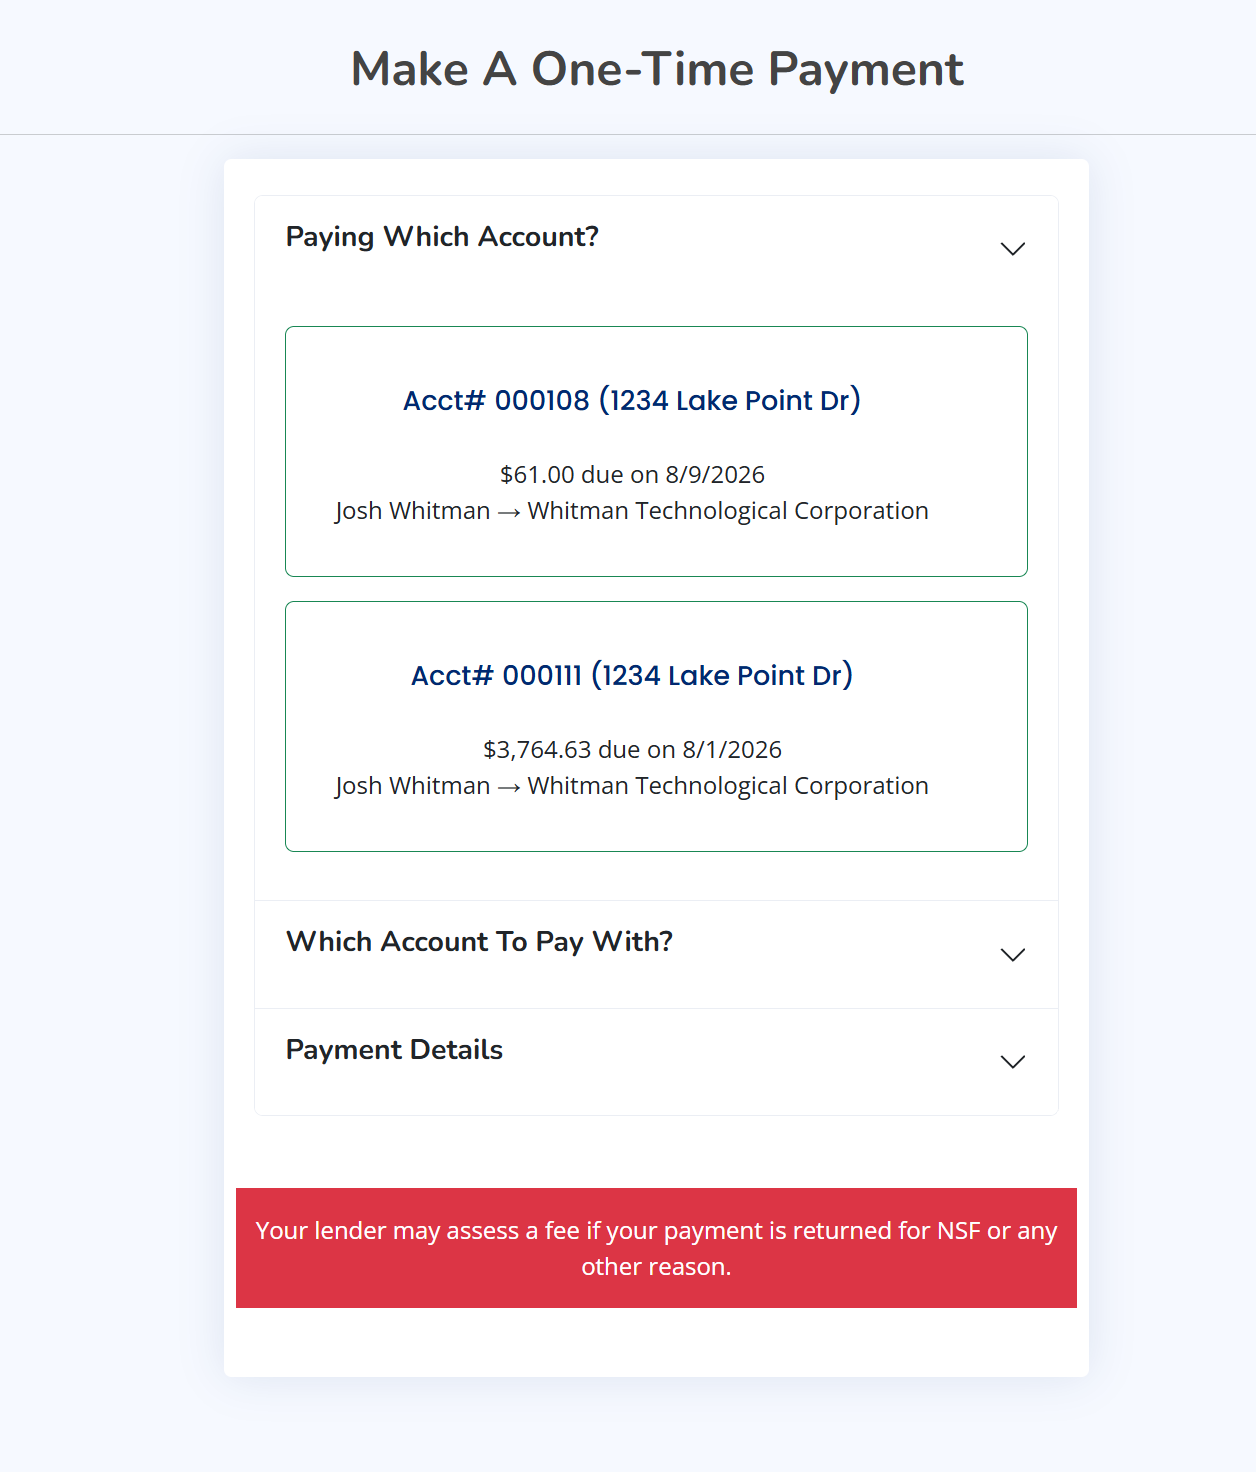
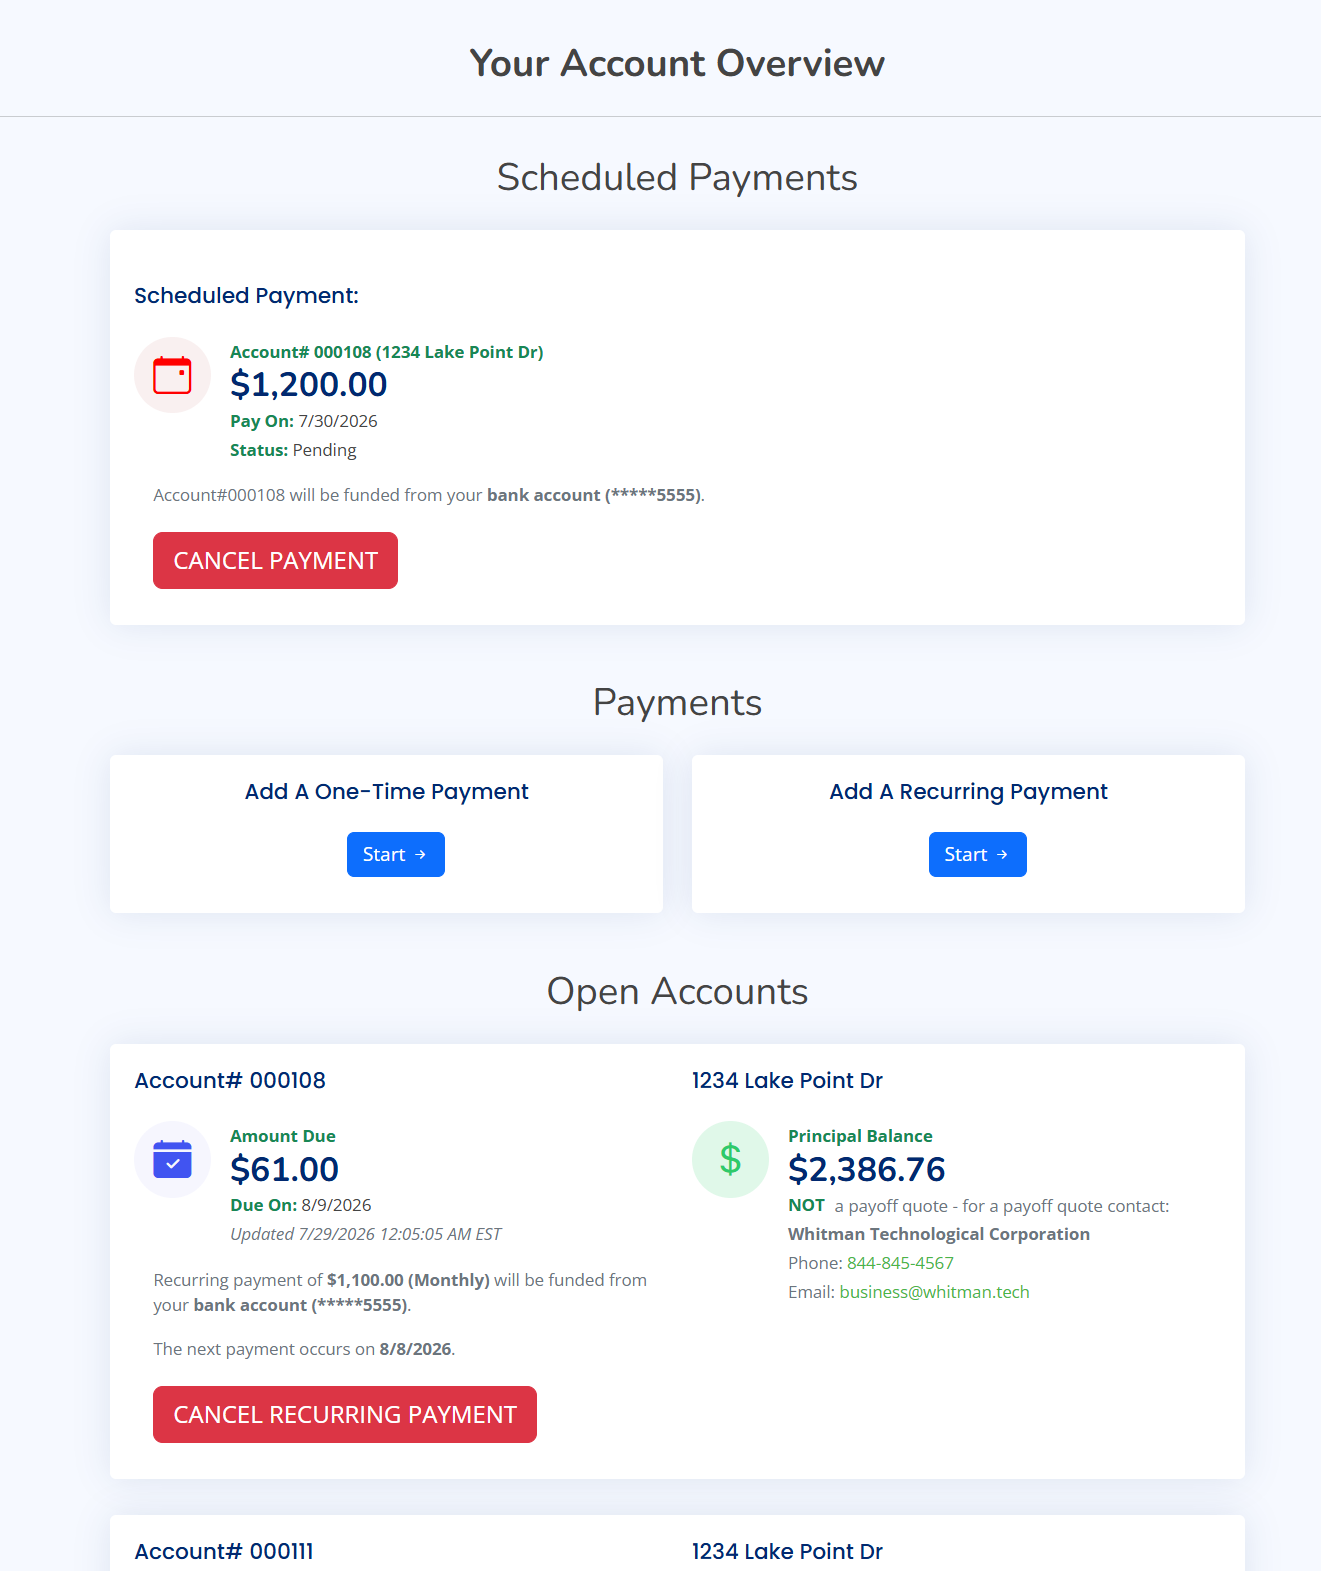
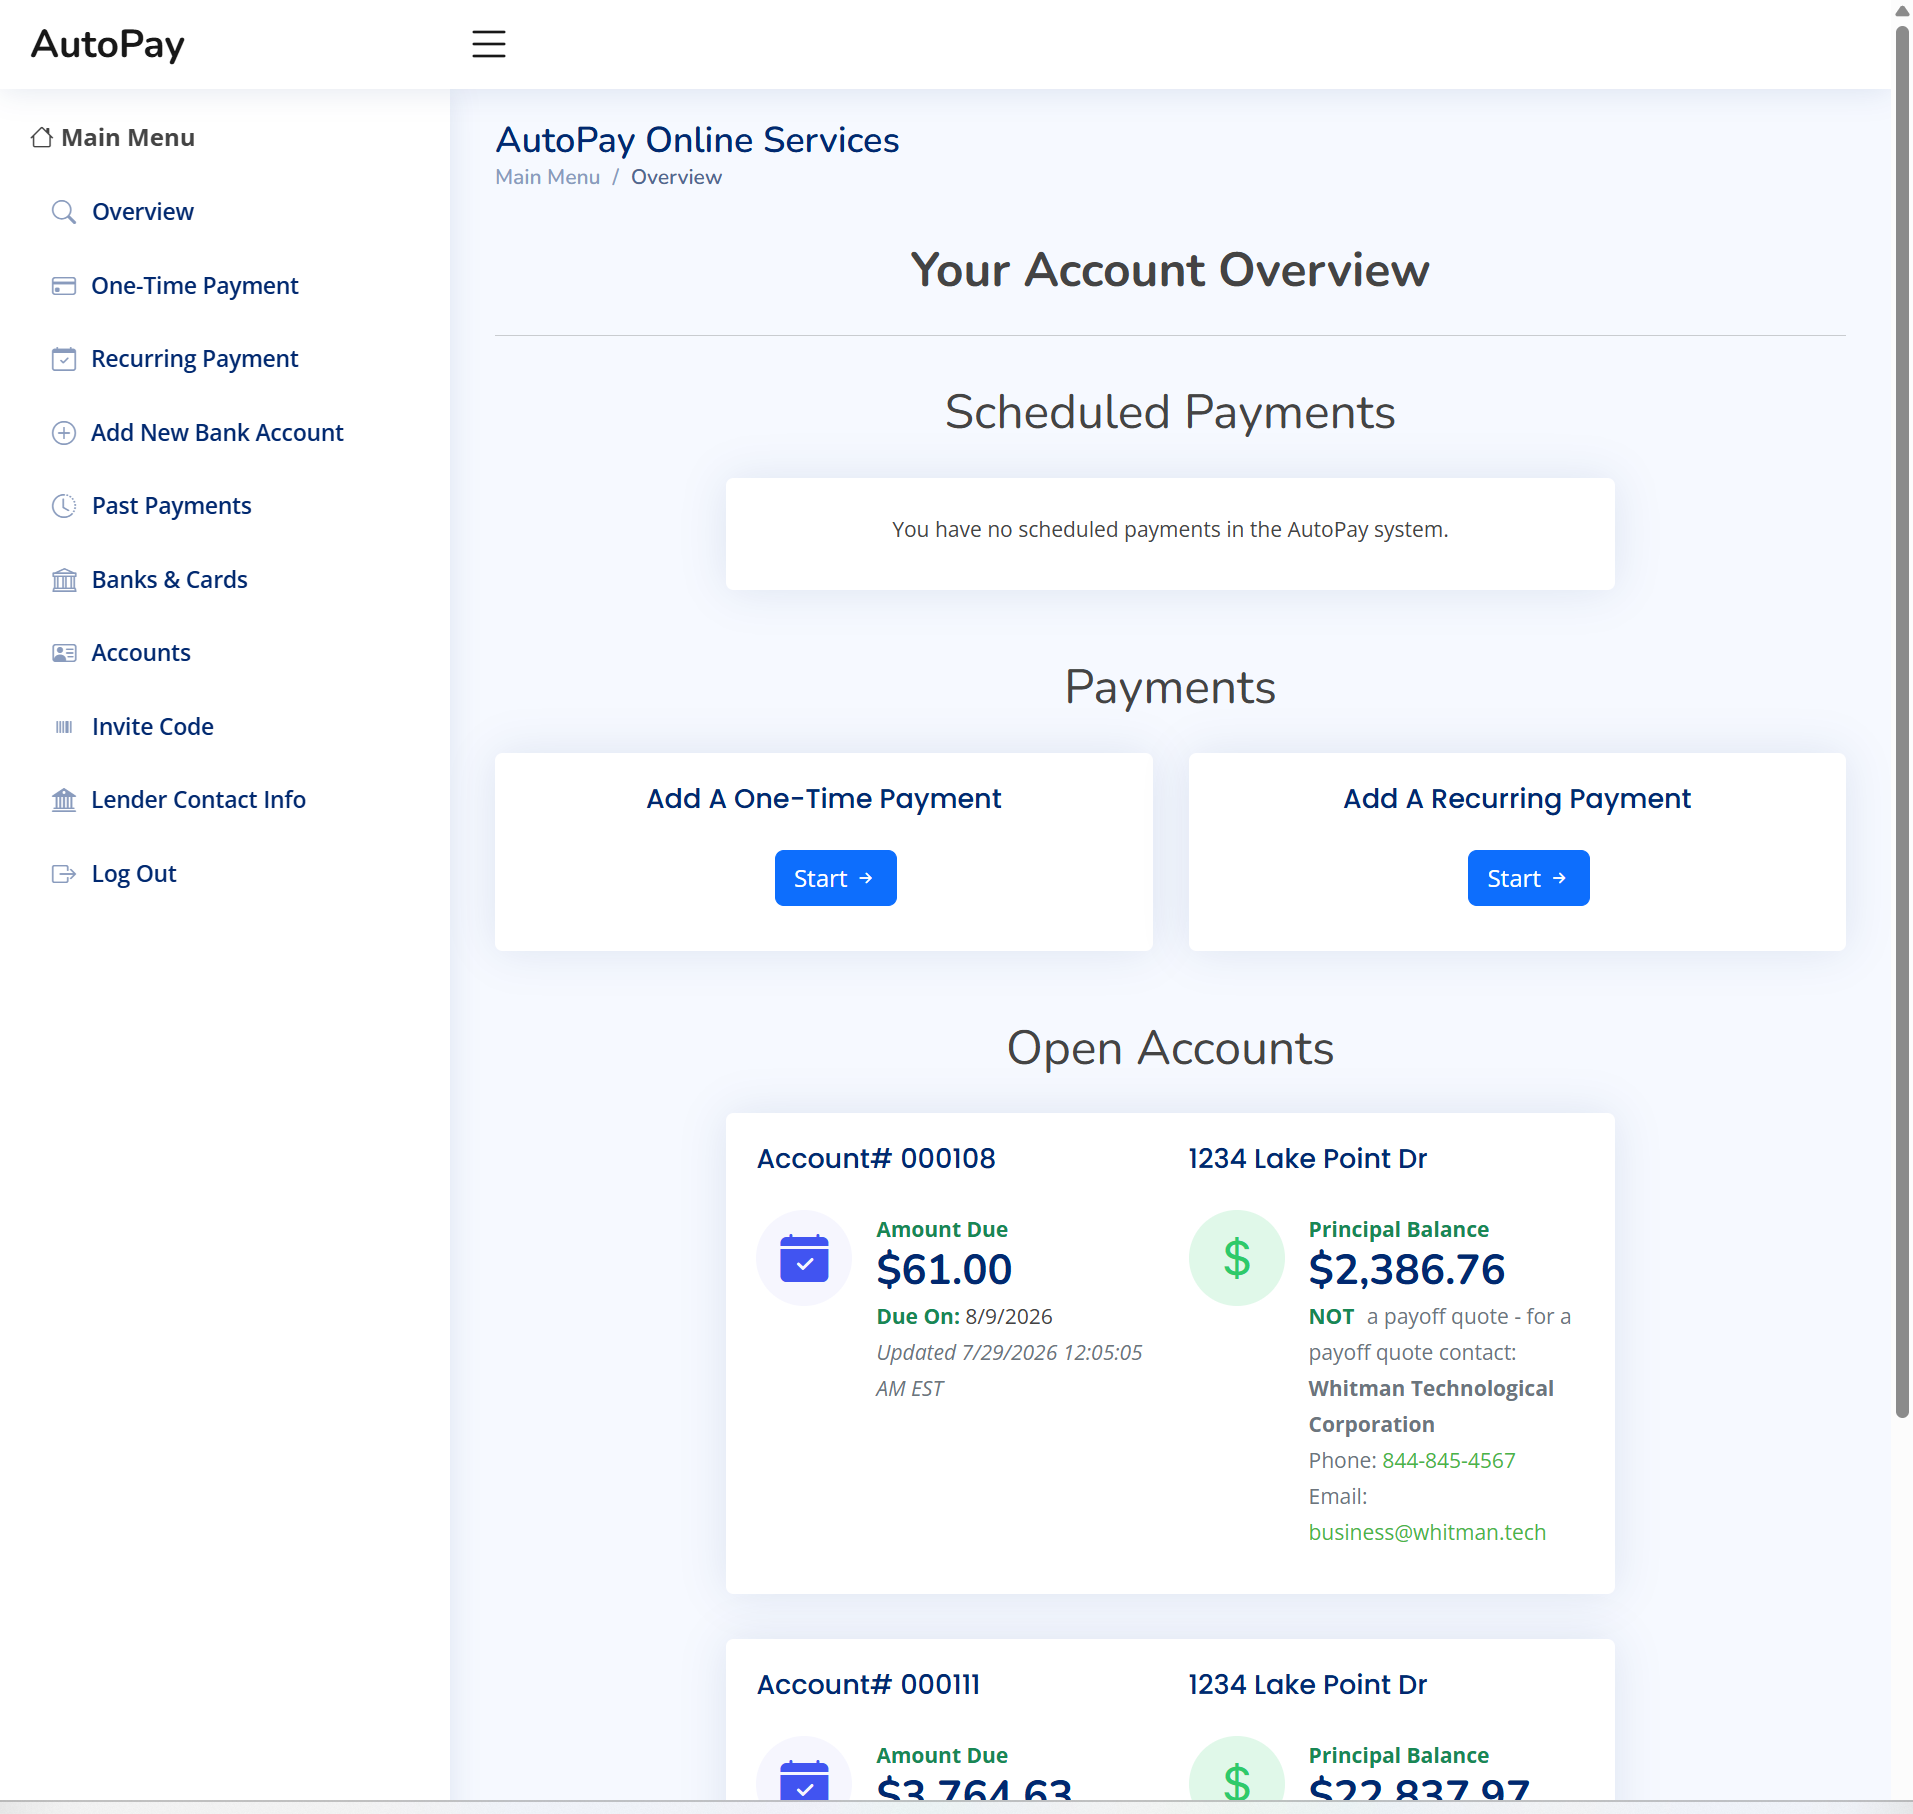
After setting their password, and whenever the borrower logs in with their email and password in the future, the borrower is shown the overview screen, which lists their accounts (multiple enrolled loans to the same borrower will show on this page and throughout the AutoPay Borrower Portal).
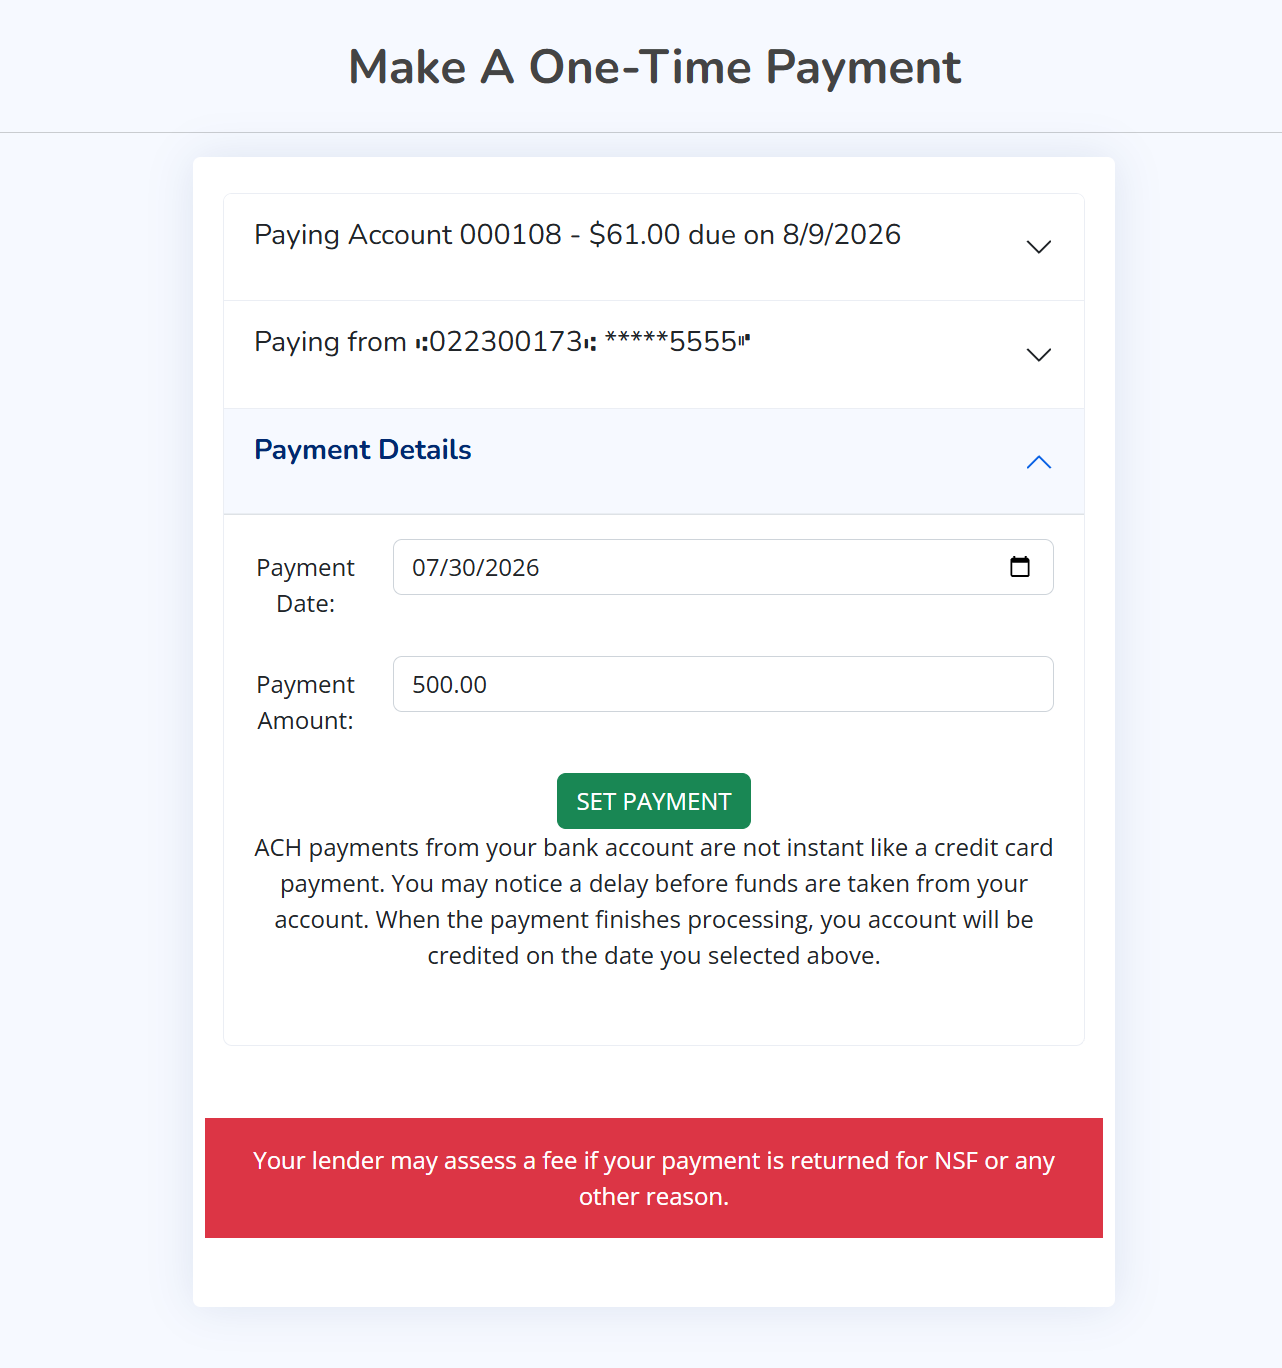
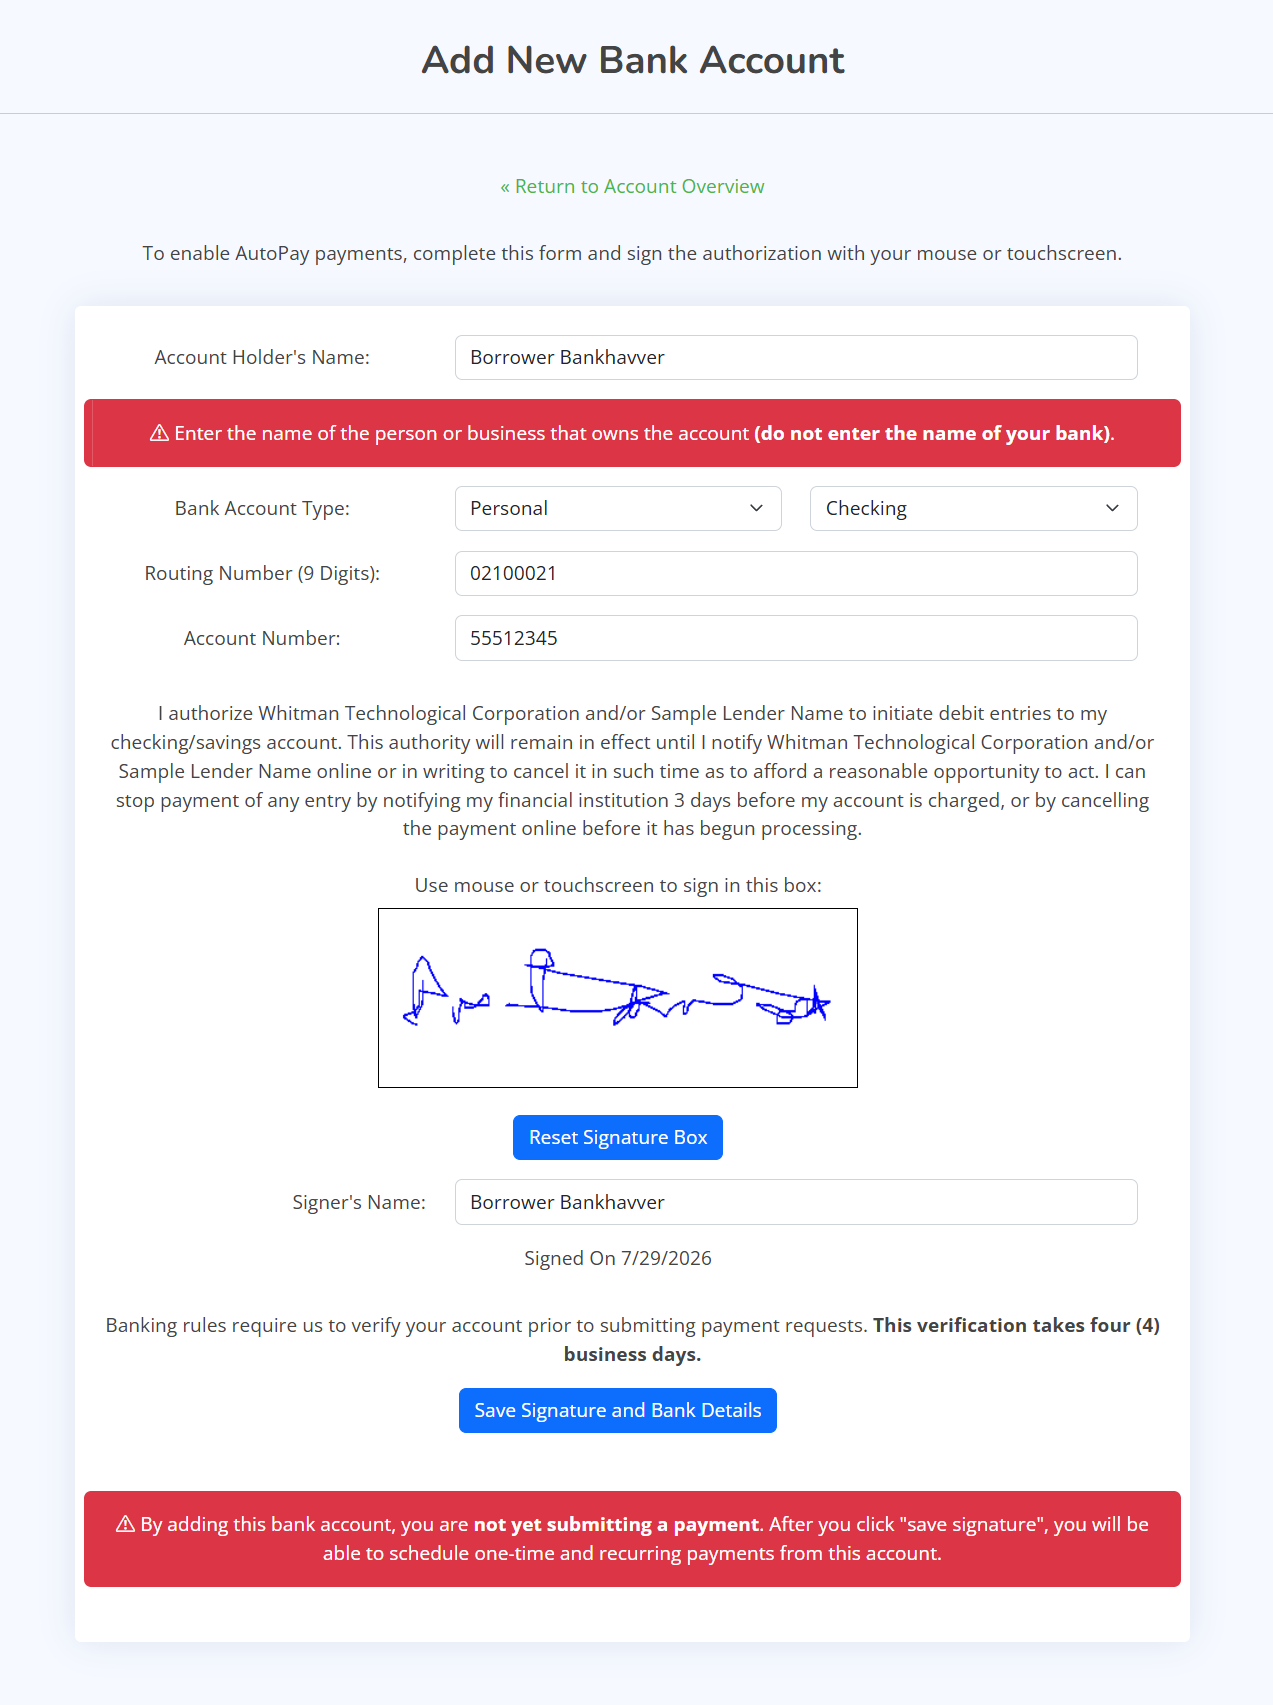
The borrower can add a US bank account and authorize debits from that account. AutoPay captures both a hand-drawn signature and a cryptographic signature when a borrower authorized debits. 😎
Once the borrower has registered their AutoPay account, you’ll see a message at the bottom of the AutoPay window in Moneylender indicating their successful enrollment. You’ll see a second line if the borrower has added their bank account and authorized ACH payments from it.
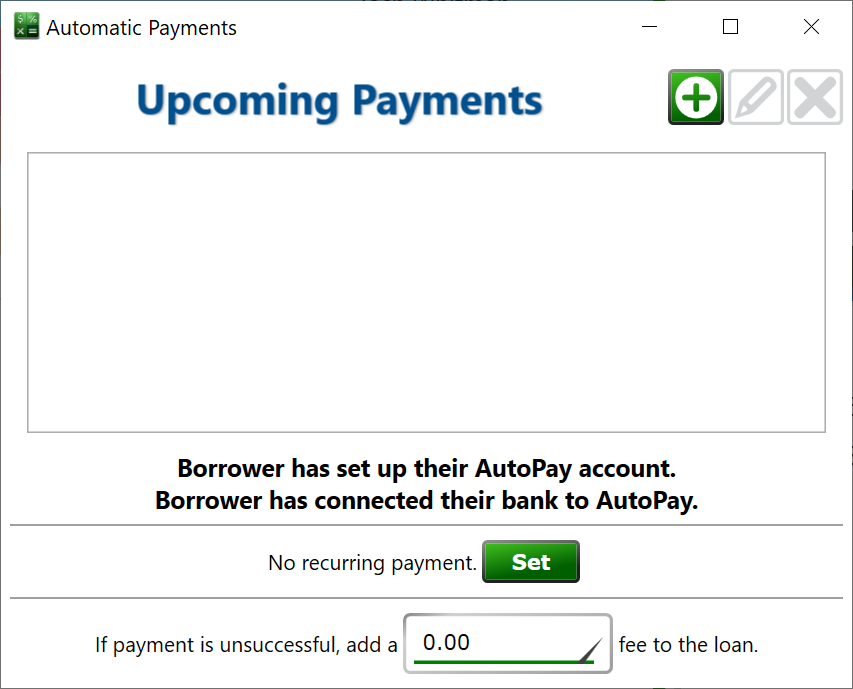
Both you and the borrower can manage the payment setting in AutoPay. If the borrower needs to cancel a payment, you can do that for them from the AutoPay window in Moneylender. Similarly, if you add a payment for them through AutoPay, they can log into AutoPay and change or cancel that payment. You are both editing the same set of AutoPay records, and both can create and cancel payments. Once a payment has gone into processing it cannot be canceled or modified.
More options on the AutoPay window in Moneylender:
The Upcoming Payments list shows every scheduled and actively processing AutoPay payment for the loan with its date, amount, and status.
Select a payment and click the X button to cancel it before it begins processing.
Click the New (plus) button to schedule a one-time payment: choose the Source of Funds from the borrower's payment methods on file, enter the Payment Amount (it starts out as the loan's current amount due), and pick a Payment Date at least one day in the future—weekend and holiday dates are processed on the next business day.
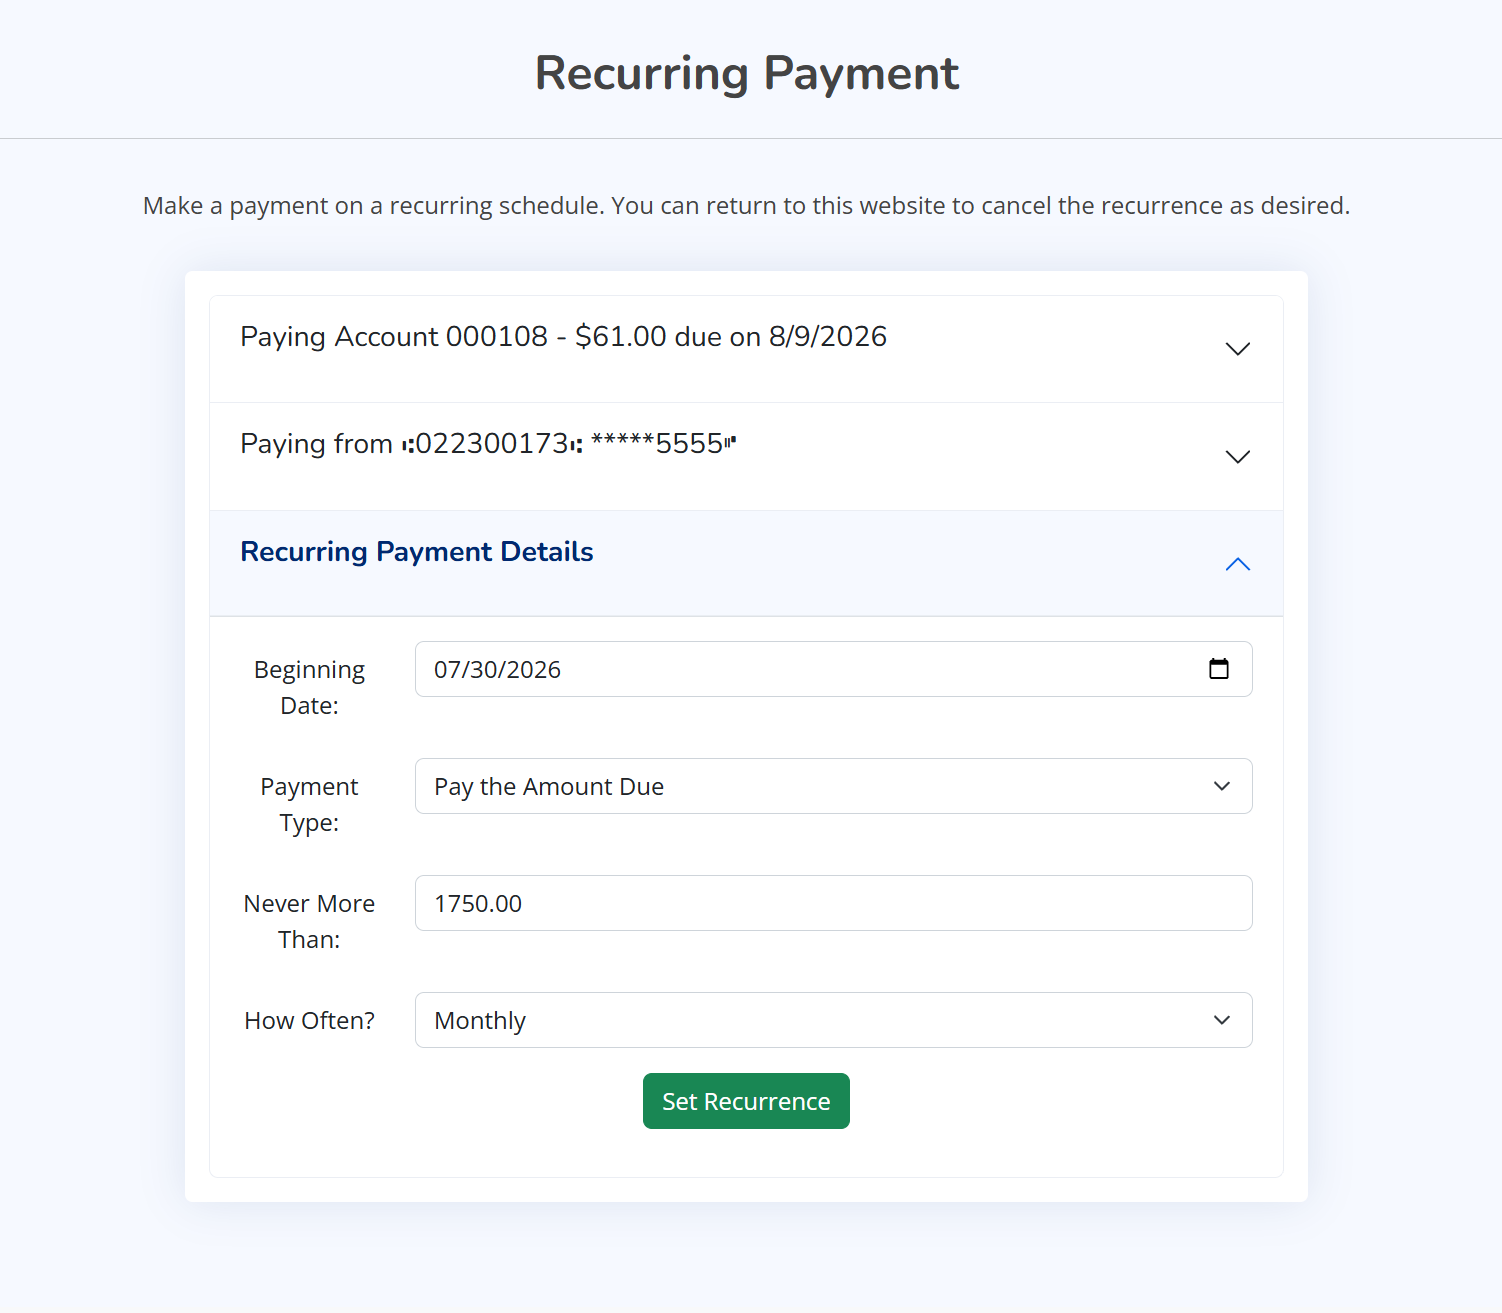
Click Schedule Recurring Payment to set up the loan's recurring payment. Choose the Source of Funds, then select Fixed Payment Amount to charge the same set amount every time, or Pay Amount Due with a Maximum to charge whatever is currently due on the loan but never more than the maximum you enter. Pick the date of the first occurrence and the Recurring Schedule—it starts out matching the loan's regular payment schedule.
If you have the borrower's signed ACH authorization on file, click Add Bank Account to enter the borrower's bank account for them instead of waiting for the borrower to add it on the AutoPay website. Click Copy from Borrower Record to fill the fields from banking information already saved on the borrower's record, enter the account holder name, routing number, and account number, choose Business or Personal and Checking or Savings, and check the box confirming you hold the borrower's signed authorization—Moneylender will not submit the account without it, and you must keep the authorization available for an ACH compliance audit.
If the loan's, borrower's, or lender's information on the AutoPay server appears out of date, use the Loan, Borrower, and Lender buttons next to Resend to AutoPay Server to send those records to the server again.
Enter an amount in the "If payment is unsuccessful, add a ___ fee to the loan." box at the bottom of the window and Moneylender will add that fee to the loan whenever an AutoPay payment is returned unsuccessful.
This should get you started. If you have multiple lenders in your portfolio and want to route all AutoPay payments to loans under that lender into a separate bank account, edit the lender record, and click Next until you get to the AutoPay Override page. Check the box and enter the bank info for where the payments should be deposited.
Bonus images of the borrower portal: