Edit Template Object |
|
The three Edit Template Object dialogs let you to control the specific properties of each Template object.
Each dialog corresponds to one of the three types of template objects: Text Box, Long Text Box, and Shape.
Select from the main menu. Click on a template, and choose Edit Template Layout. Access the Edit Template Object dialogs with the corresponding buttons at the top of the Edit Template box.  The Text Box and Long Text Box appear identical. However, you can enter 10,000 characters of text in a Long Text Box
object and only 250 characters of text in a Text Box object.
The Text Box and Long Text Box appear identical. However, you can enter 10,000 characters of text in a Long Text Box
object and only 250 characters of text in a Text Box object.In the template, click on the part you want to modify, then click the Edit Selected Item button. A template editing dialog appears for that section. 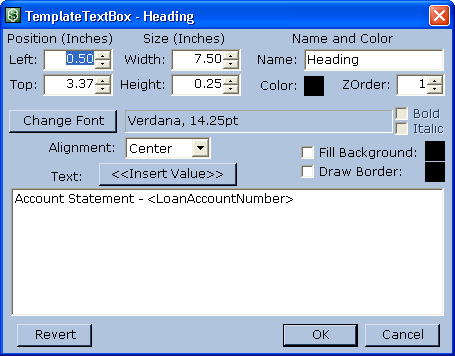 Click Change Font to select the typeface, size, and bold or italic options. Checking Fill Background or Draw Border adds those effects to the Text Box object. Click
the color boxes to the right of these check boxes to change their colors.
Click Change Font to select the typeface, size, and bold or italic options. Checking Fill Background or Draw Border adds those effects to the Text Box object. Click
the color boxes to the right of these check boxes to change their colors.Type any text you would like to appear in the large box labeled Text:. Clicking <<Insert Value>> opens a dialog displaying the list of all available tags for adding values from your records into the text. When printing a template, these tags are replaced with the actual values from your records. In most cases, a description accompanies the tag, providing more information about the values each tag represents. 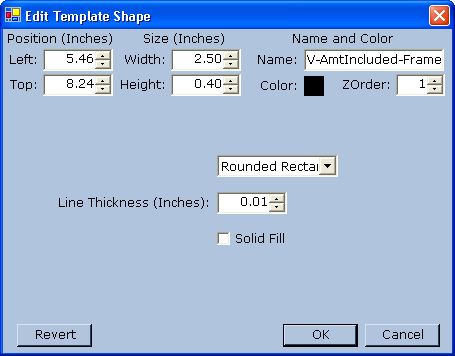
The Shape object has a simple interface. Use the Color to set the color of the line or fill. Select the type of shape from the drop-down list. If Solid Fill is checked, the selected shape appears as a solid color on your template. If Solid Fill is not checked, you can adjust the thickness of the outline of the selected shape. |